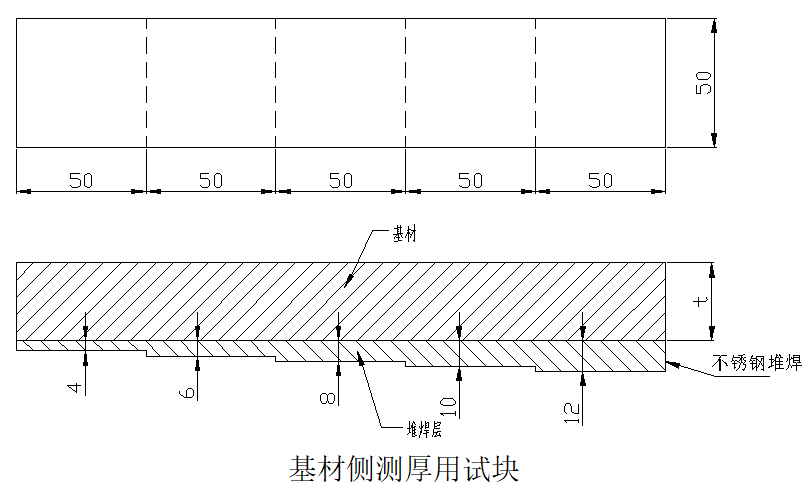
The base material side thickness test block is designed according to the requirements of the surfacing layer thickness measurement methods of pressure equipment such as austenitic stainless steel and nickel alloy, and is suitable for calibration of the measurement from the surfacing layer side with the twin crystal straight probe of ultrasonic thickness gauge. The substrate is 20# steel, and the surfacing layer is 304 stainless steel.

Test method: The single crystal straight probe is measured on the substrate side
a) Adjust the horizontal linearity and scanning range of the instrument on a test block with the same or similar acoustic characteristics as the substrate;
b) Using the above test block, place the probe on the substrate and locate it at the center of each step as far as possible, adjust the instrument gain so that the amplitude of the interface echo between the surfacing layer and the substrate of the test block is 50% of the full scale of the fluorescent screen, read out the displayed value of each substrate thickness and the corresponding bottom wave at this time, and compare the difference between the two with the actual value of the test block one by one;
c) Place the single crystal probe on the surface of the workpiece substrate, adjust the instrument gain, so that the amplitude of the interface echo between the test block and the substrate is 50% of the full scale of the fluorescent screen, read the displayed value of the workpiece substrate thickness and the corresponding bottom wave display value at this time, the difference between the two is the thickness of the workpiece surfacing layer;
d) The displayed value of the thickness of the workpiece surfacing layer is corrected according to the comparison result in b), that is, the thickness of the workpiece surfacing layer;


